Slow progress
It hasn’t been too long since our last update, but we haven’t finished anything ‘big’ yet we can write about. We are however making great (but slow) progress. We have worked on a lot of different things, most not worthy of a post by itself so we thought we would show you a few random bits today (mainly to show you we haven’t been sitting still!).
The battery box
The battery is heavy (30kg) and we needed to make sure it stays where we put it, so a sturdy base was required. We had seen lots of fancy aluminium ones, but, in true Jon and Jude style, we decided to make our own. Several pieces of floorboard were glued together, with a rectangular space that was exactly the size of the battery. Not sure what we’ll do when we ever need to replace the battery with a different one, but we’ll deal with that issue when it arises….
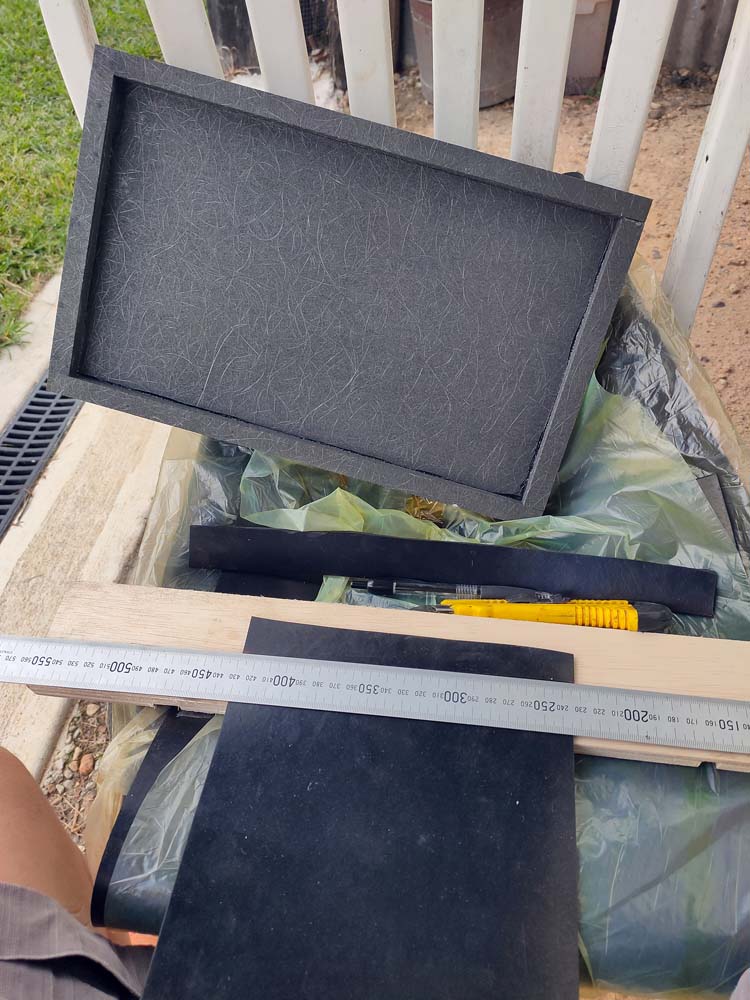
making the battery box base out of floorboard, rubber and some aluminium bits
The base needed to be painted and then a piece of rubber was cut to fit the bottom of the battery. As we were going to put a strap around the battery, we wanted to make sure the strap wouldn’t cut into the floorboards, so 2 little aluminium pieces were cut to size and glued to the strapping area.
We then glued the base to the floor (also floorboard) with Terreson, so we are pretty confident it won’t go anywhere. Soon we can hopefully add the battery and see it in action!
finished battery box in place
The little pieces
What does that mean? It’s the little pieces that we still needed to cut to finish the cupboards and the drawers. These little pieces you hardly notice (some are even hidden), but are crucial to the interior and the structural integrity of our cupboards and drawers.
Cutting these little pieces doesn’t take much time. They are small and most can be made from a piece of leftover falcatta ply. It’s connecting them to the existing structure that takes a while. Adding the brackets (which means adding more nut inserts) is not always straightforward. Sometimes we need to remove several pieces to be able to drill the holes, and sometimes we even need to create our own specialised brackets, made-to-fit that exact location because a standard bracket doesn’t fit (or doesn’t work) there.
Jude made these little pieces and spent hours fitting them. She made three pieces for both sides of the drawers connecting the structure to the walls. Two on the passenger side and one on the driver side. And there were several other tiny pieces to be made and attached. We still need to paint all these small pieces, but we think we have made them all now (fingers crossed).

two of the visible ‘little pieces’ – one next to the drawers and another one next to the backrest.

the triangular piece to close off the space behind the backrest
A hole
It looks like a random hole cut in the kitchen box ceiling, but it is strategically placed to get us out of trouble if we ever need it. It wasn’t much work, but we thought you might appreciate reading about these things as they show you the level of detail we have to think about to get this interior to the finish line….
In our kitchen box we have 3 drawers. We had to use a smaller drawer for the top because the catch for the hatch is in the way of a full-sized drawer. Because of this catch we also needed to come up with a way to keep the drawer sitting towards the rear of the kitchen box so the drawer doesn’t accidentally block the catch from opening (work in progress…). If however that mechanism fails or (more likely) we forget to use this mechanism before we drive off and it jams the catch we have no way of moving the drawer out of the way so we can open the hatch.
So, we decided to make a hole in the ceiling of the kitchen box. If we need to, we can use it to hopefully push the drawer back a bit and we can open the catch again. There is no other access to the kitchen box apart from the hatch to the outside, so it is critical we can access it.
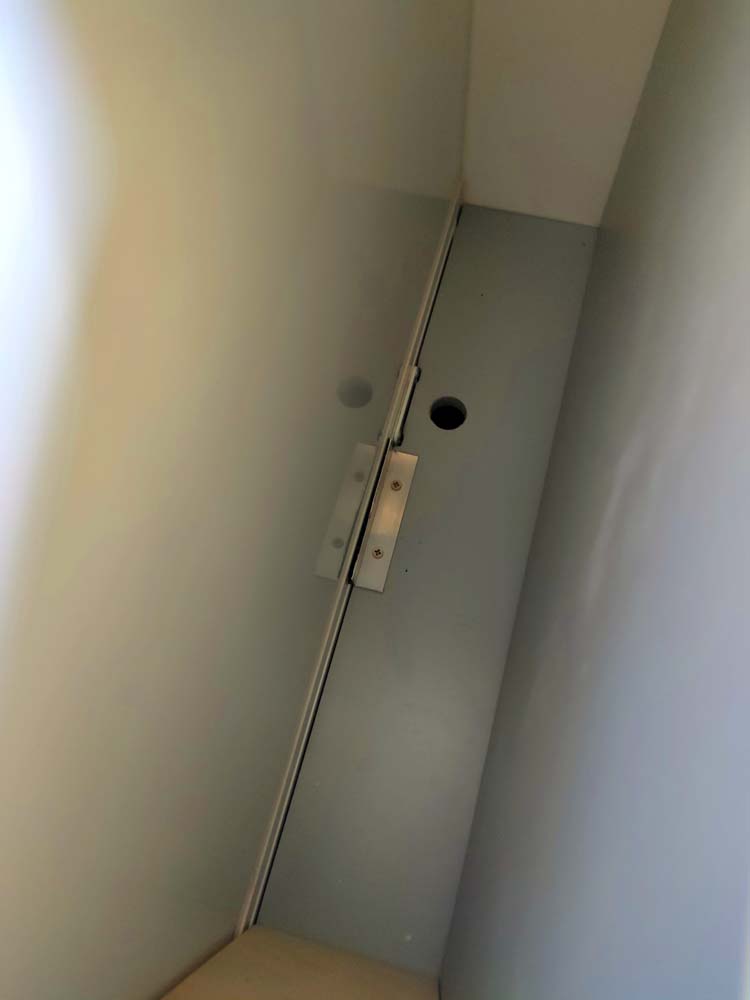
the hole – this is looking at it from the top, next to the drawers underneath our bed
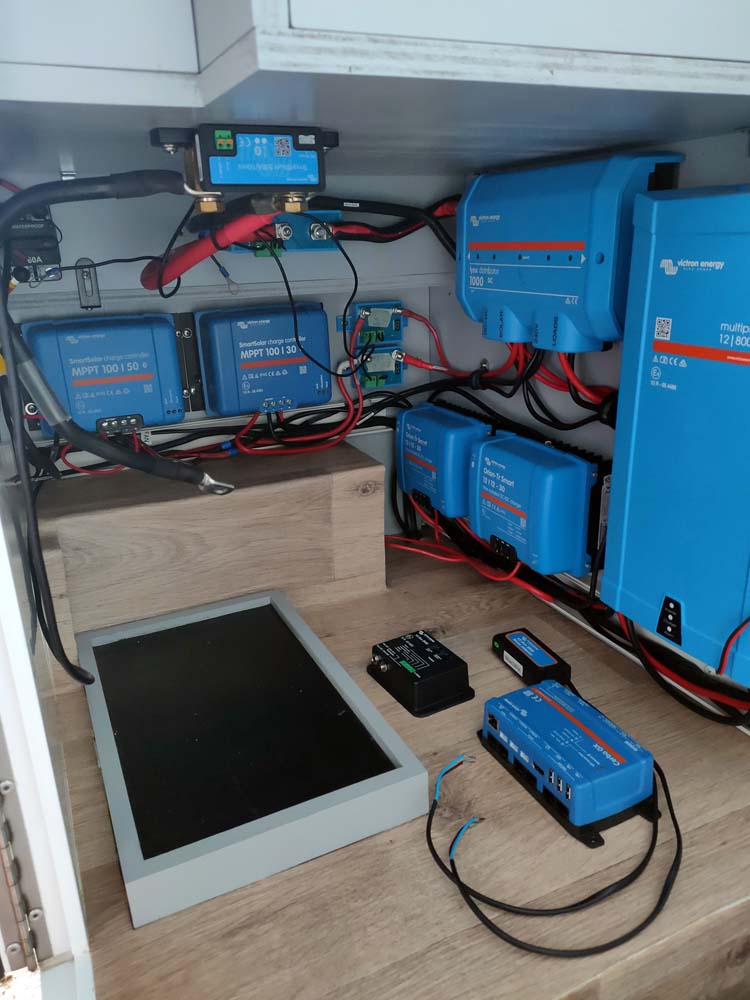
Solar
We’ve already shown you the electrical diagram and have written about installing (most) of the electrical components, so you know we are having two solar panels installed on the roof. They are now actually in place, glued down with lots and lots of double-sided sticky tape. Crazy, but apparently sufficient. We certainly hope so as we would hate to see our panels fly off the roof when driving on a motorway in Italy or so….
There is a gap under the very thin panels which allows for air to circulate. This is to assist in keeping the panels cooler, which in turn means they are more efficient in producing energy for us.
We’d already spent a night adding the tape to the corflute strips that came with the panels, and another night adding the strips to the panels before we took them up on the roof. We have one on either side of the skylight, and once we had marked their location it took less than half an hour each to add them. We drilled the hole through the roof too so we can run the cable inside, but still have to add the entry cover and the MC4 connectors to set it all up. These connectors require a special tool to attach them to the wires, so we will ask Jared to do them for us. We just need to get up on the roof now with some Sikaflex to add the entry cover.
Jude adding the double-sided sticky tape to the spacers
Jon pressing down on the tape to make sure it bonds well

Jude adding the spacers to the solar panels
And that entry cover also had to be modified a bit. We want to be able to open the grommet on the front (where the cable enters the cover) and remove it if required. However, once you glue the entry cover on the roof you can’t access the nut located on the rear of the grommet, and as the nut was loose it would just fall into the little space under the entry cover if you tried, and no way to access that area….. so we decided to glue the nut in place, meaning we can always remove the grommet if we ever need to.

peeling off the backing so we can glue the solar panels to the roof
The above are all (mostly) little jobs. But as with all little jobs, they take time. Lots of it. So if you have been wondering what we have been up to lately, it’s the little jobs that have kept us busy. We are also working on a few bigger things, hopefully we can finish one (or more) of them soon so we can give you another update with some photos showing the results!
So if I say “keep on trucking”, is that appropriate? xx
we will 🙂 will we see you before you head off again back to the lap??
Remind me, what battery have you fitted?
We’ve got the 330Ah lithium from Victron.