Lara gets her walls and roof
We are super excited to tell you that the next phase has already been completed. Lara now has walls and she finally looks like a real campervan!
We had to get the floor done so we could drop her off at Styromax, the company who made her walls. And, as they also offer their services to put them up, we jumped at that option. So yes, we cheated and had somebody else glue the walls together for us. But we are mighty happy we did, as this is what she looks like now.

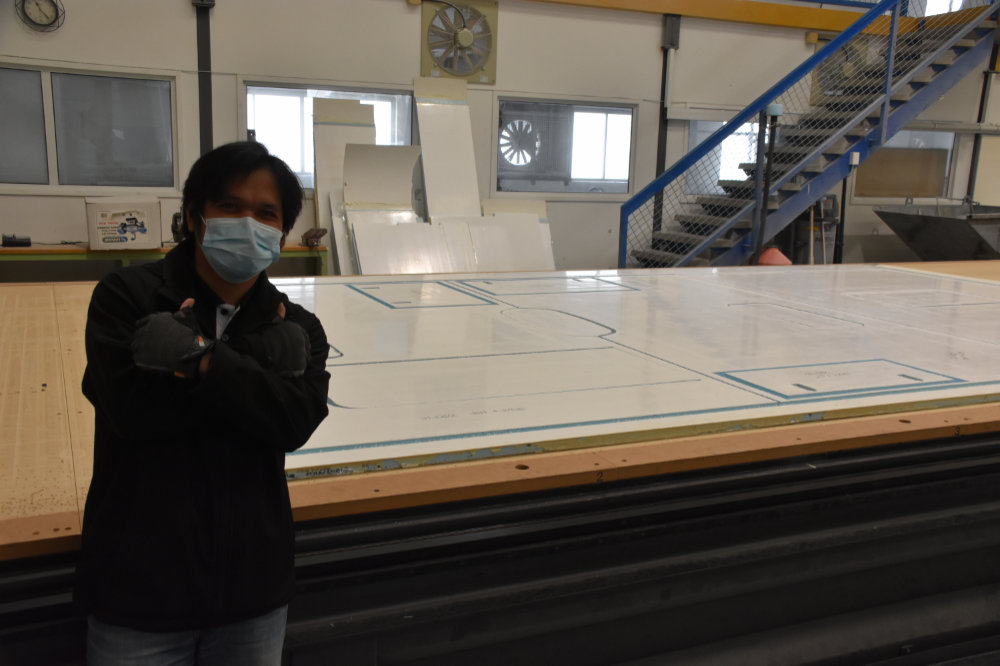
Jon and Jude in front of the new Lara, now looking a lot more like a campervan

Lara from the top, the rectangle in the middle of the roof will become a skylight
Apparently cutting and gluing all the extrusions for the pop-top is rather involved and tricky. And, also something we wanted to make sure was done correctly, as you don’t want a leaky roof…. For those of you interested in how they made our roof, you can watch this video made by Styromax, it is Lara’s pop-top in the making, used as an instructional video (we will post the link here as soon as Styromax have made the video as we didn’t want to keep you waiting for the update).
So, yes, we threw money at it and made a giant leap forward in a short time-frame.
If we step back in time a bit, we can tell you a little more about how we got to this point of actually having walls made and glued onto our sub-frame with floor.
The entire process to get your walls made by Styromax starts with drawings. Our drawings on a bit of paper that they then turn into CAD drawings. Or, if you can draw in CAD yourself, you can of course also just hand over the finished CAD drawings to them directly.

one of our drawings that is then converted into a CAD drawing, the dotted line is our height of the cabinets inside
We took a lot of iterations of CAD drawings before we got to the final one that was fed into the computer. Reflecting back on that journey, we could have probably cut out a lot of versions if somebody had told us to only send through lots of corrections at once. And in the first few versions we were only focused on checking if they got our drawings correctly, instead of actually working out what we really needed.

a few of the CAD drawings grouped together, it becomes quite tricky to check it all when all the dimensions are added too
We also came in one day to do the final measurements before the panels were approved. They prepare a section made of fiber-glass that shows the wheel arch. That way you can clamp the fiber-glass section to the sub-frame and make sure the wheel arch is located in the correct spot. Otherwise it would look slightly odd if it is not aligned.

Justin (our CAD specialist) doing the final measurements before the walls are made and cut. The strip of fiber-glass on this side is a trial piece to ensure the wheel arches fit correctly in the right spot
Then they create panels large enough to cut our walls and roof out of. The panels are built up from a layer of 1.5mm fiber-glass, then a core of 25mm of foam, and then another layer also of 1.5mm fiber-glass. Making a total of 28mm for our panel thickness.
Once the panels are made, they are taken to the CNC router table. It is a massive table, but our job didn’t take up that much space on it as you can see. The CNC router then slowly cuts out the walls, the windows and the door, layer by layer. First the fiber-glass is cut, then the foam and then the final layer of fiber-glass. Sometimes they even have to do the 25mm of foam in a few cuts, as the foam would otherwise heat up too much.

Jude and Sam looking at our walls and roof being cut on the CNC router
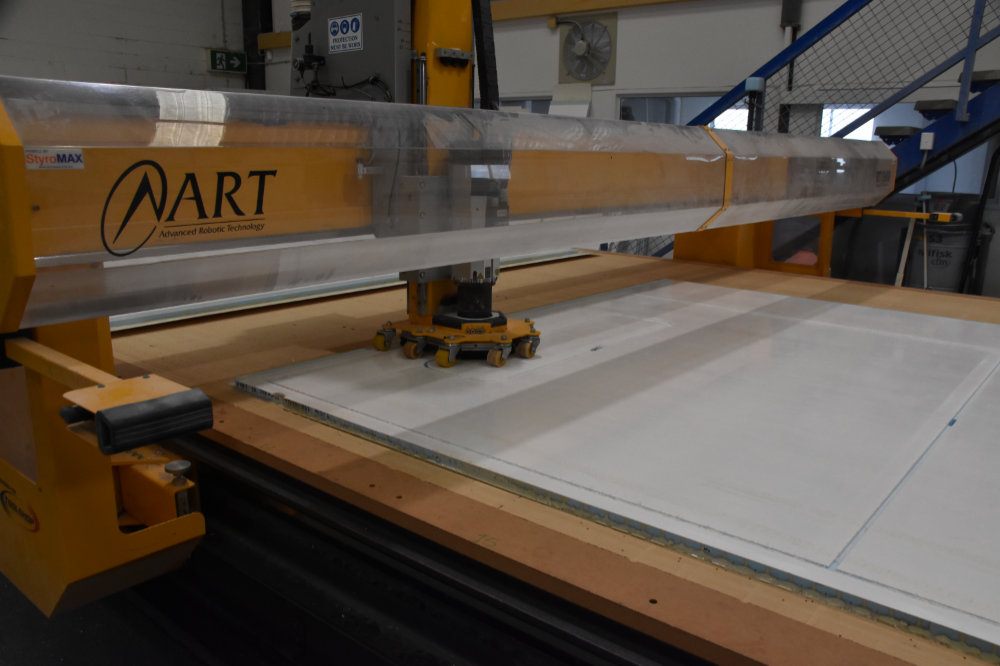
the CNC router at work
We were incredibly lucky to see their CNC router in action on our very own wall panels and roof panel as they were on the cutting table when we dropped her off. Denmar was overseeing and managing the whole process, from the computer drawings, to changing the router bits, to clearing out the bits with a giant vacuum hose. It was great to watch.
Denmar cutting our panels with the CNC router
They are then loaded onto a giant trolley and wheeled to the assembly area in the other hall. That’s where Lara was parked up, waiting for her walls.
When they glue the walls, they also cut out all the extrusions for the hatches, add the locks and the hinges, put the windows in place and hang the door. And then of course they create the pop-top with all its extrusions, its locks to keep the lid on when we’re driving and giant scissors to make the roof go up and down….
And that’s how you get the end result we currently have.
From sending in the first drawing to getting her back with the walls fitted took less than 4 months, to give you an idea how long we have been working on these walls already.
For the next phase we will be also be cheating, as we again pay somebody to do the work. Bernie is going to connect the cab to the walls of the box, and put her roof back on (the roof of the cab). We’ll be giving you the updates on that very soon again we hope! Hope you are as excited as us to see her take shape.
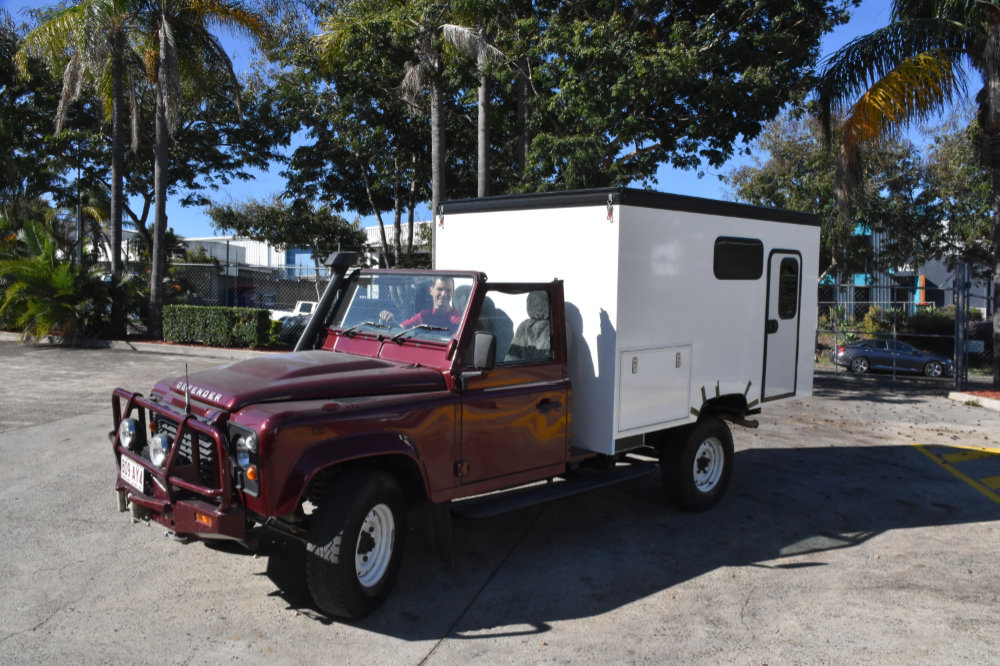
Jon driving Lara with walls and roof out of the big hall
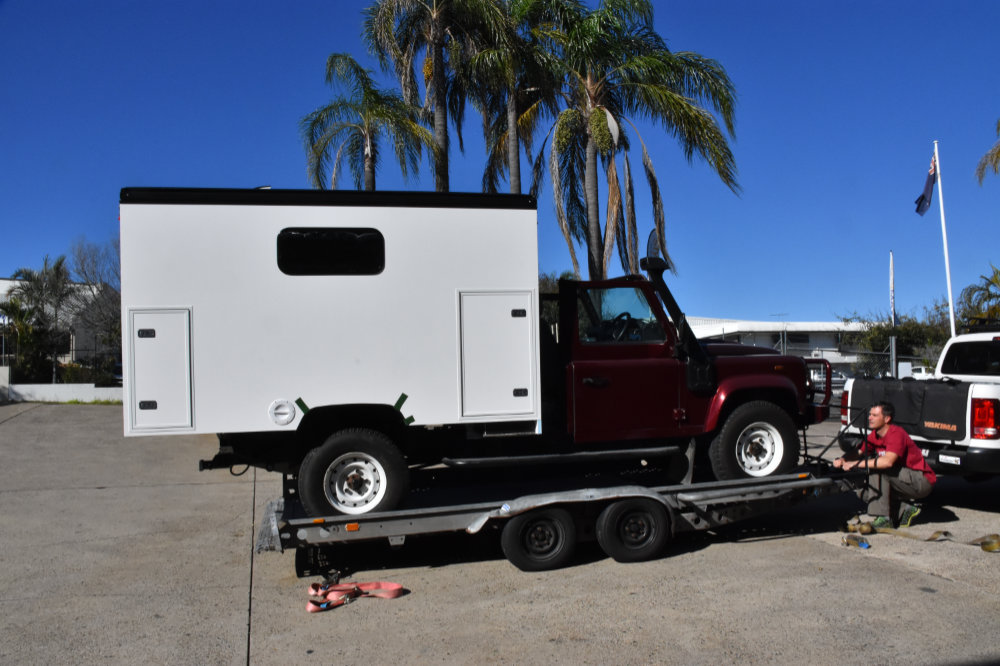
this is hopefully the last time Lara needs to go onto the back of a trailer
I thought you would keep the “cabriolet car”! 🤣😂
hahahaha, yeah would have been fun, until it rains!! 🤪
She looks awesome! Very cool to see the ideas and drawings take form in real life – well done guys, it’s been a big journey, and you’ve achieved so much already! x
Thanks Angie! Hopefully you’ll get to see her (and us) in real life soon!
Wow, that is so awesome! Well done guys, she looks amazing!!!
thanks Janet! Glad you like her looks 🙂 Hopefully one day we will be able to park her up in front of your home!
Waanzinnig knap luitjes!! Wat een genoegen zal het zijn om hier straks mee op reis te gaan!! Goed bezig!!!
Liefs,
Annie Theo uit een zonnig Oost Souburg. XX
😘 we hebben er zin in! Maar zien er ook naar uit om het interieur te maken! Dikke knuffel terug! xxx