Cables, wires and more cables…
When you travel around in a campervan, it is nice if you can charge your laptop, have some lights inside and you can pull out a cold beer from the fridge at the end of the day.
We wanted all of the above (and a few other ‘nice-to-have’ things). I guess we are getting old and like our creature comforts? Or we just like to travel in style! So, to accommodate our desire for comfort, we had to install an electrical system in Lara.
Where to start….
The first thing we thought of was the battery. We knew we needed a second battery (also called house battery, but I guess in our case it will be called the palace battery). We knew that from our white Defender 110 that was converted to an overland vehicle extraordinaire. It means you can leave your fridge on when you are parked up for the night, or even when you go out for a hike in the middle of the day. And when the fridge can stay on, your beer stays cold (and cheese, don’t forget the all-important cheese). And when beer and cheese are cold, you’ve got two happy campers.
But then that battery needs to be kept topped up. How to do that? There are several options. You can run a generator, hook her up to the mains power (inside a caravan park for example), run the engine of the car, or hook her up to some solar panels, either fixed on the roof, or loose and placed on the ground nearby.
We don’t want to run a generator, are rarely (if ever) parked up in a caravan park (although we do plan to visit friends and family where we might be able to plug her into mains) so those two were out for the general day-to-day charging. That left us with solar and the engine as the main ways of charging. After much deliberation, we opted to add both.
We also wanted to be able to charge our laptops in the palace, have a few lights hard-wired in (not too many), and of course have a fridge. We also needed things like a water pump and wanted the luxury of hot showers again. We had that option in the white Defender 110, and we definitely wanted that again. We looked into cooking with an induction plate, but at the moment these are still too power hungry in our opinion and for our needs. We don’t want to end up in the situation we can’t have a cuppa because our batteries are running low! All those decisions had to be made before you can even attempt to calculate the needs for your electrical system.

our very first sketch of the electrical system we wanted

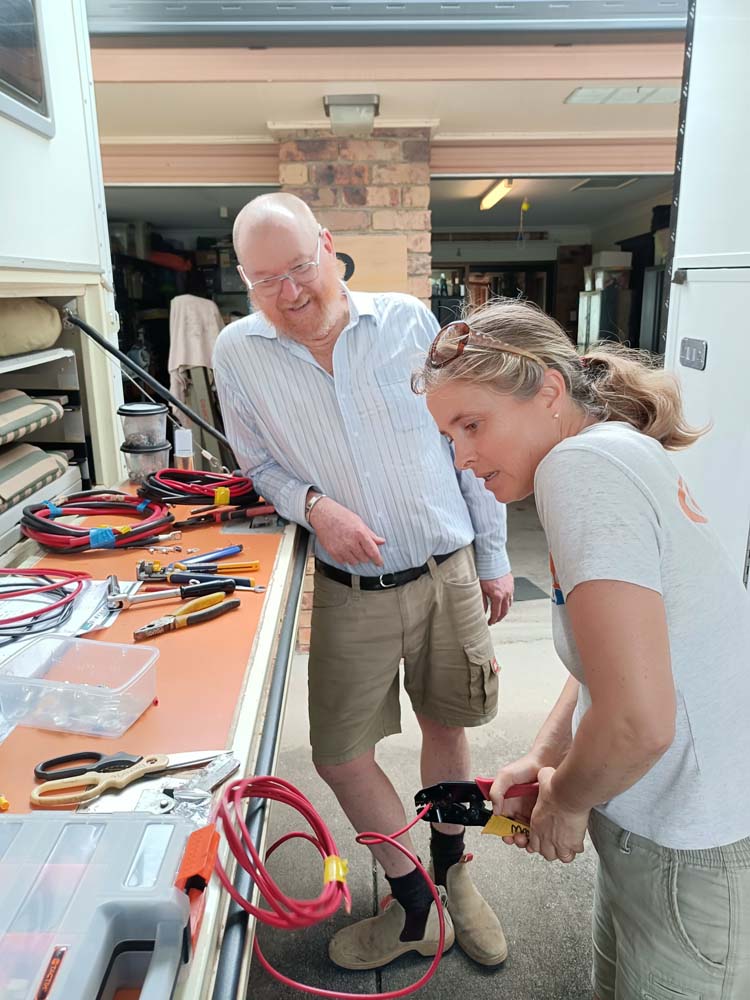
pouring over the wiring diagram with Ingo
Jude spent lots of time reading websites and books, and talking to lots of people about electrical systems to find out what could work for us and what we wanted. And it was our friends who provided us with all the information we needed to come up with a plan. (special thanks go to Roland as always, John M, Mark H and Ingo for all their time explaining things time and time again). We picked components, and after weeks and weeks of drawing up our wiring diagram, we finally came to one that we could use to place our order.
Surprisingly when we placed our order with Jared, he managed to get pretty much everything we needed in a week or so. The only thing that took a bit longer was our battery, but we had already decided on that much earlier so it arrived around the same time. It was nice to not have to wait for something for months for a change!
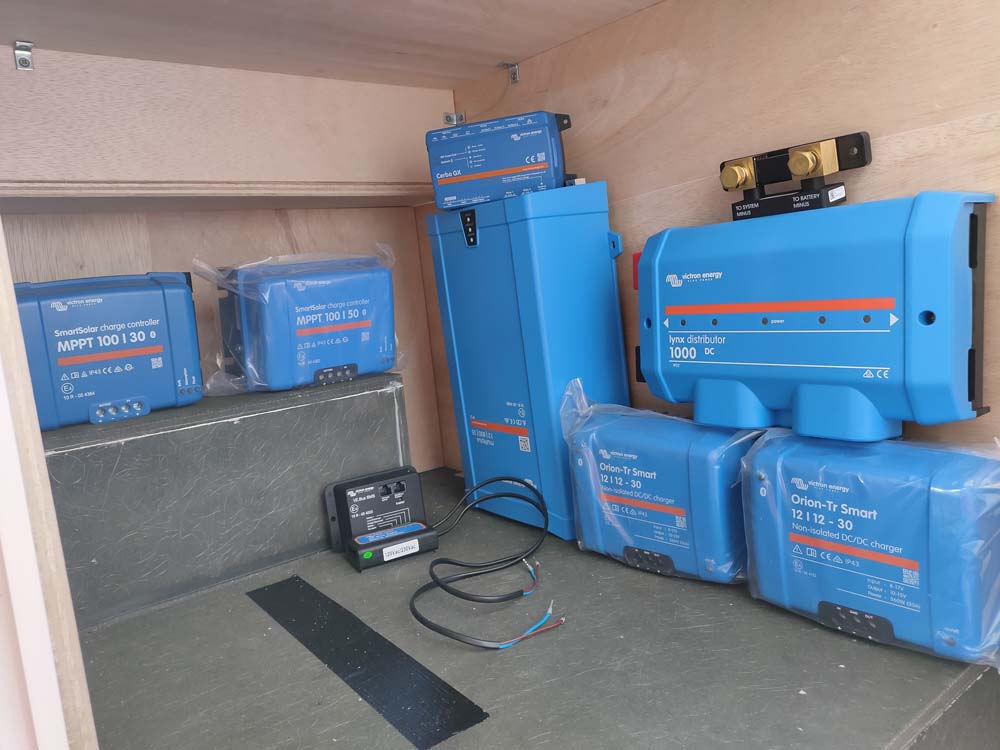
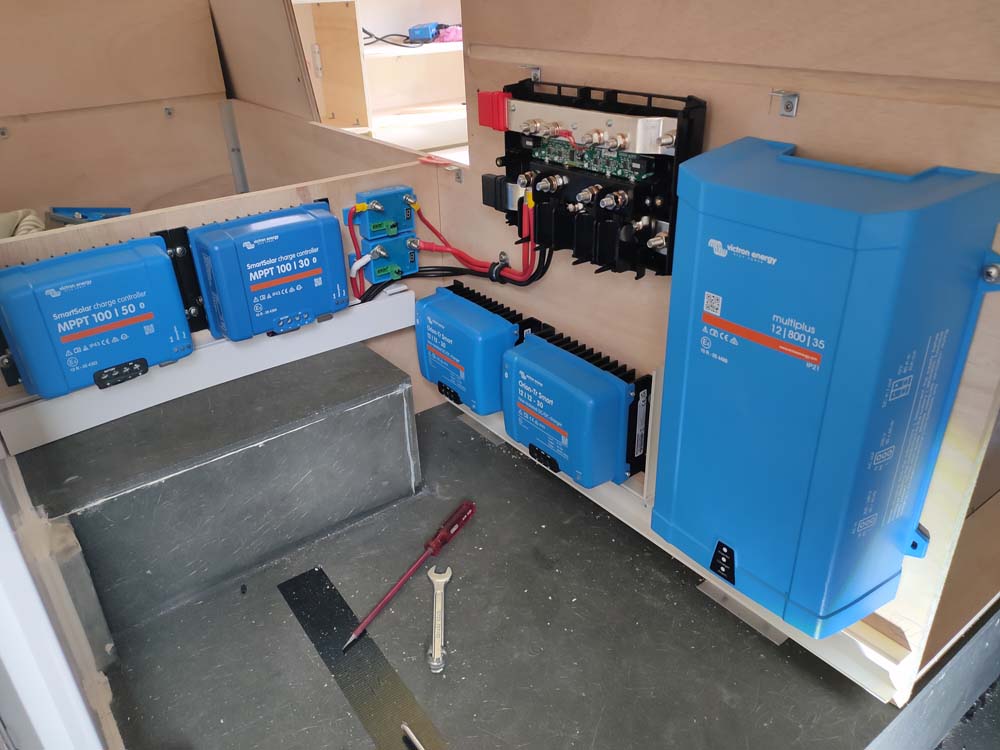
Once we had our blue components (we picked Victron as our supplier, a Dutch company that seems to be available worldwide), we needed to start the real work. No longer was Jude drawing lines on a piece of paper, it was time to get the drill out and put some things inside the palace and run some cables between those blue boxes.
first lesson in electrical tools from John
John M kicked us into action, which was very much needed as we were not quite sure how to get it all started. We had a few areas in mind where we could mount things, now was the time to see where it would all actually fit. We ended up mounting it all in the area in between the spare wheel and the seat inside the palace, all on the driver’s side. John and Ann came to visit us one Monday afternoon, and John spent it with us trying to work out the best location for all the blue boxes. They spent the night in Esk (in their 4wd truck called the Boomer) and the next morning we continued the work.
a very first try to see if we could mount all the Victron gear in this area, the black tape on the floor marks the space the battery will reach
John then invited us to visit their place on the weekend so he could continue helping us. It was just what we needed (a kick up the bum basically and a lot of hand-holding when we drilled the first holes to lay the cables, ran our first bits of ducting and crimped our first cables to put the correct lugs on them). We would drive over in Lara, join them for a cuppa, start work and then Ann had lunch ready, made cups of tea for the breaks and even cooked us dinner several times!
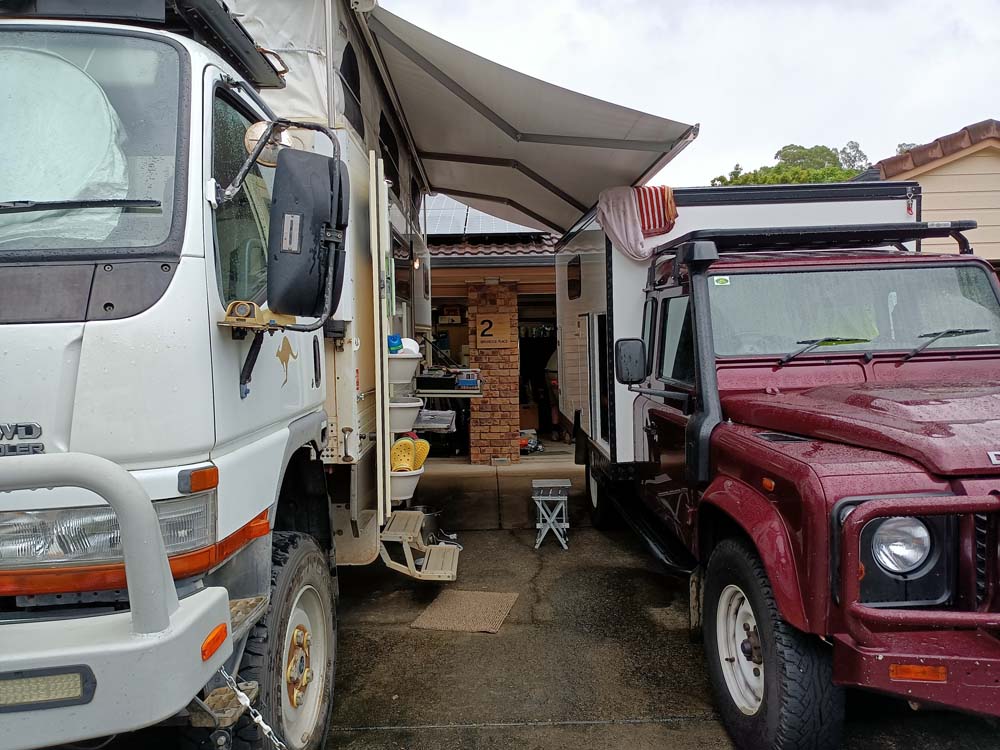
our setup at John and Ann’s place – Lara next to the Boomer which provides the shade
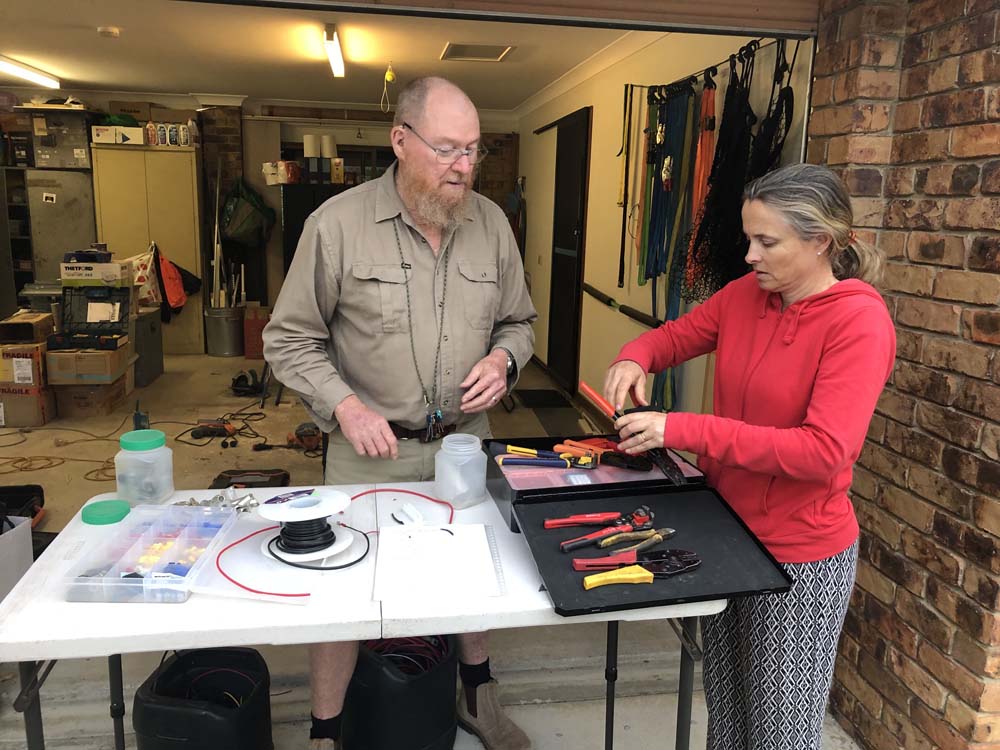
John showing how to heatshrink the cables with lugs
John supervising, Jude crimping
with the Victron boxes now mounted, the first few wires are run between them
Every time we got together the next piece of the puzzle became much clearer, and every time a new shopping list was created with the next pieces we needed. Even on a Sunday we were able to drive to the shops and get what we needed to progress as John and Ann only live 5 minutes away from Pickering St, the place where we seem to hang out a lot these days….
John showed Jon how to drill the holes through the fiberglass and into the conduit for things like our rear video camera and the external lights, set us up with tools and even loads of cables and lugs so we could do more work during the week.
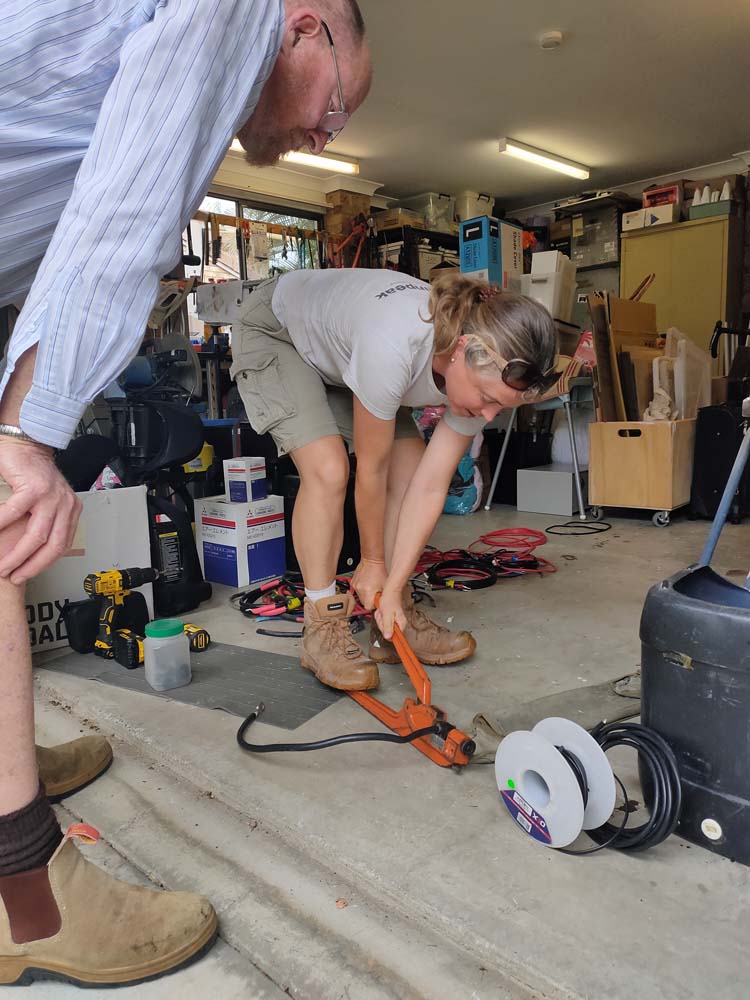
the big cables require a seriously big crimping tool (thanks John C) and some serious muscle to crimp them
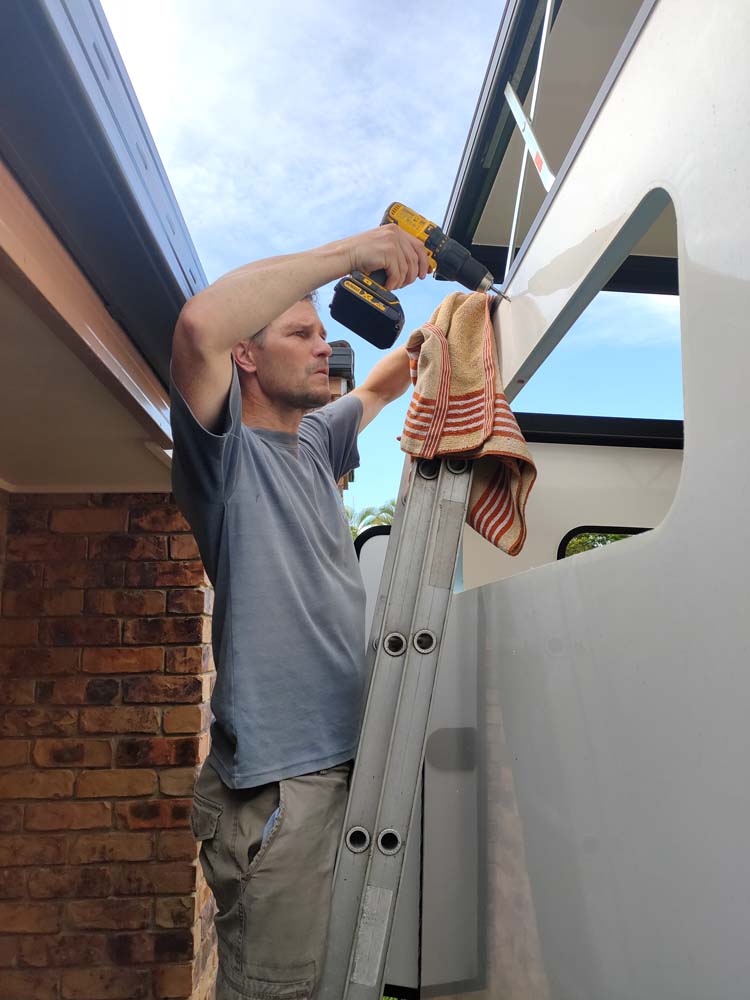
Jon drilling into the rear panel to mount the rear view mirror camera as well as the external light
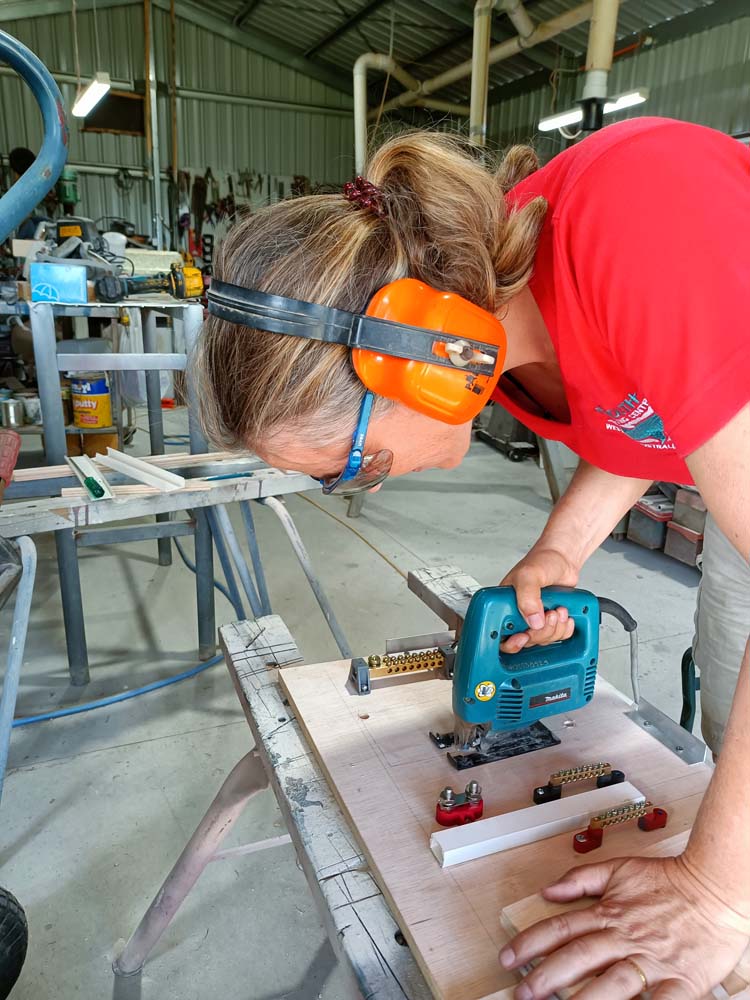
doing the electrical work sometimes requires holes to be cut – Jude cutting the holes for the two switchboards near the entrance

the panel near the entrance door is taking shape – more has been added already
We certainly haven’t finished yet, but we have run most of the cables to their required location. And most of them have already been connected to the switchboard near the entrance door. It’s now a question of connecting the remaining wires before we drop it off with Jared who will connect and program it all (a lot of the Victron gear is smart so we can monitor the status of our system easily, but it does require some programming).
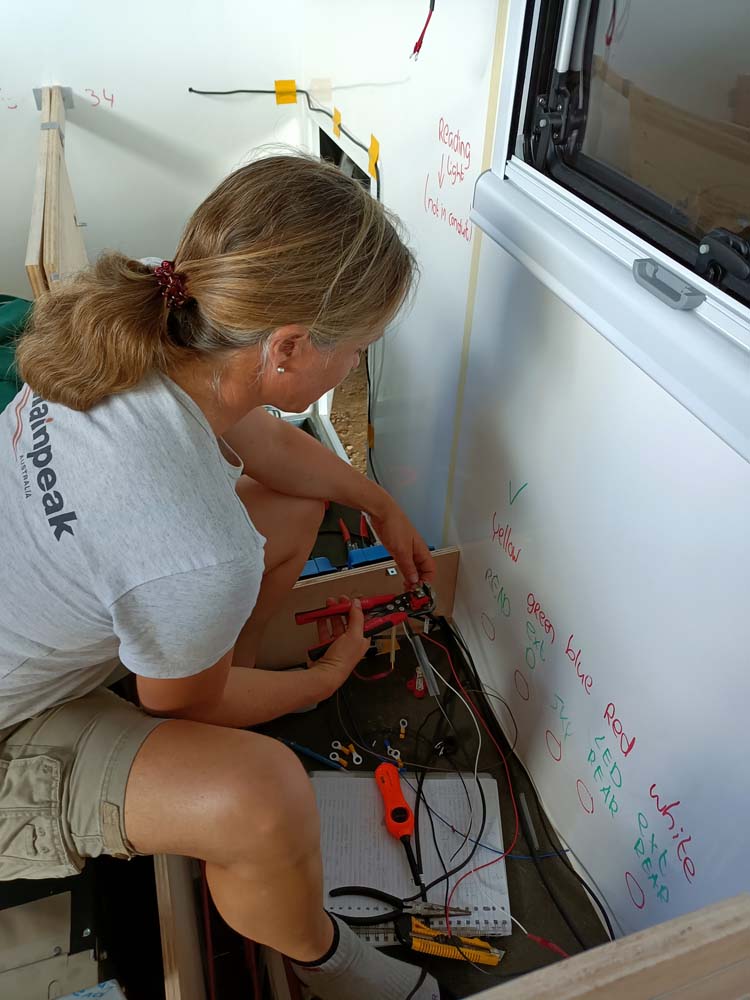
Jude running cables and making connections

Jon drilling some more holes to run cables, this one is for the reading light

Jude inside Lara crimping connections onto wires

John showing Jude how to connect the different loads to the switchboards

John and Jon assessing the situation in the battery box – we need to add a breaker and connect the DC DC cable to the battery

the switchboard with a few wires already – many more to come once we have finished painting the cabinets
So whilst we can’t show you working lights yet, we are well on our way to a luxury palace complete with lights, hot water, a heater, fans, oven and of course a fridge.
If you want more detailed information about our electrical system, or you would like to know how or why we have done certain things, you can check out the separate post we wrote called ‘Electrical overview and wiring diagram‘. It has our wiring diagram as well as an overview of all the Victron components and our electrical equipment.
Nice to read some technical stuff. And Jude seems to have the skills of an electrical nerd. Fantastic!
wasn’t sure if people were interested in the technical stuff! great to know 🙂 and thanks I guess hahahaha, not sure I am any good at it, but I can copy what victron shows in their diagrams! (with the help of friends!!)
Een indrukwekkende operatie! Erg knap om dit te doen. Bewondering en respect voor jullie inzet! Een goede voortzetting! Ferme groet uit zonnig Oost Souburg!🌞😎💐😍
dank jullie wel 🙂 er komt weer een weekend aan om verder door te werken! En hopelijk volgende week weer een nieuwe blog om te lezen 🙂 hoop dat het in souburg goed gaat met alle benen en tenen!
Very interesting account of your electrical system.
My theoretical designs are usually good, but I was an electrical design engineer, and used electrical fitters to implement the installations. THeir work was a piece of precision art! I haven’t the skills for a neat job such as yours, and mine would (does) look like a rat’s nest!
I am aware of charging conflicts on house battery controllers.
I have tested a few systems on our various rigs.
The controller I fitted on our past canopy camper had a dual input, dc-dc (30a) and solar from a 200w panel.
There was a contest of accepting inputs. The unit selected Solar as priority, even when only 1 amp was being input. This inhibited the alternator input of 20a+ on a low battery.
It is because the way charge curve input is determined by controllers is to look at the voltage of the battery.
As the solar was presenting a charge voltage, then the alternator dc-dc input saw that the battery didn’t require the charge.
This was an issue after parked up for a time overnight then driving off when the battery was down.
When driving, I switched off the solar input (a few amps) and immediately got a charge current of 20a+. That is the way I had to use it.
On the present Hilux camper I have fitted a dual DC-DC and MPPT input controller that I chose because it stated in the spec that engine charging had priority.
It is said that some units (Redarc was quoted) charge concurrently, integrating solar and engine inputs The Redarc info says:
https://www.redarc.com.au/what-is-green-power-priority
Not sure it combines the inputs, but implies it does..
For a system such as yours that charges via separate dc-dc and MPPT inputs, I wonder how this conflict is overcome.
Does your VITRON system link the charge curve by any clever communication between units to sort the integration algorithm for maximum charge?
Ian
thanks Ian! Ours might end up looking like a rat’s nest too once we have finished adding all the cables! We had to take it all apart so we can do the painting of the panels so we stopped before it was really completed! And that is a very interesting dilemma you describe…. I hadn’t thought of that potential clash. But yes, I guess we’ll have to monitor it and see if the Victron ‘smarts’ can manage a charge from both at the same time, or which one it will favour. I guess once up and running we can see it in real life. And if, like yours, the solar is given priority despite only giving a marginal input, we might have to revert to manually turning the solar off when driving… time will tell and we will report back to you hopefully in a few weeks / months’ time!!
(and I have corrected your theoretical :-))
Yes, I’d predict that an integrated system such as your Vitron would deal with this.
You’ve a great robust system here.
We are ‘springers’, ie don’t stay long in one place. I like to see pumping up the battery as soon as we are driving is a comforting event.
When will we see you on the road??? or even cracking the champagne before the inaugural christening? (We none of us ever finish the journey of design and ‘improvements’!)
We’re like you! Usually don’t stay long in one place as there is always more to explore and discover! And yes, initially we were even contemplating not putting any solar in at all as we anticipate we can probably top up the batteries most days with just the drive….
How long is a piece of string?! 🙂 We are hoping it will be good for a shake-down trip in a few months or so hopefully!! Another update coming out soon, we have made some more progress towards the finish line! We will be sure to let you know when it happens!
Looks complicated! By the end you can sit the exam to become an electrician! 😉
ha, yes we can start a new career…. 🤪