Lara
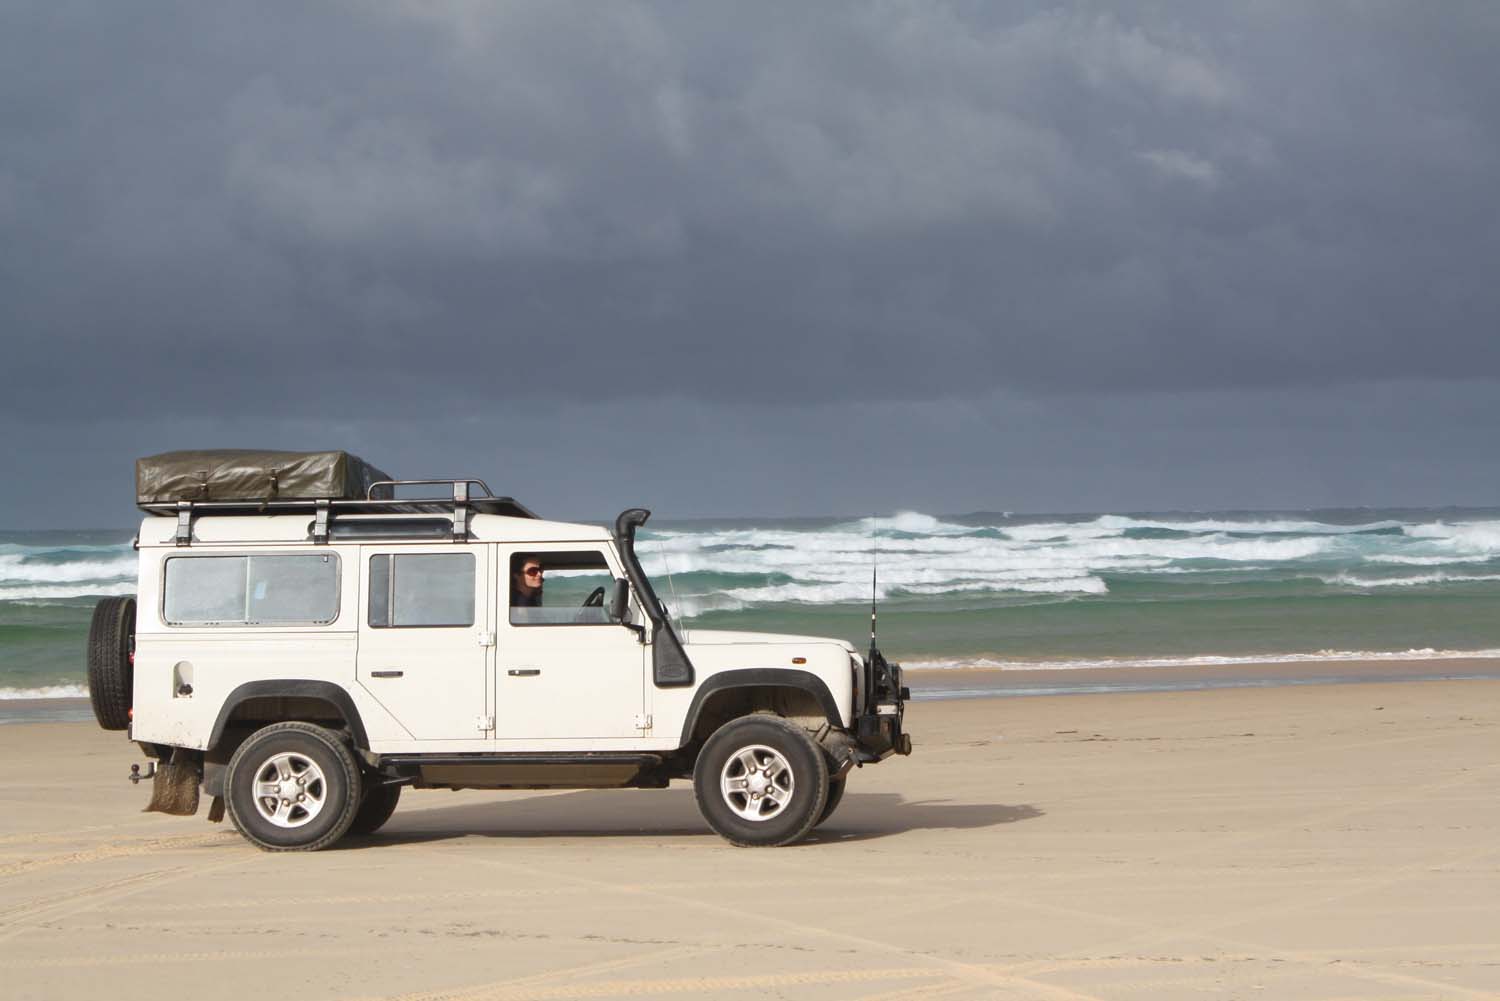
Lara is a white Land Rover Defender 110 from 2006, but she is no standard vehicle. Over the years she has been kitted out with many awesome features. If you think cars are boring this bit is not for you!
But if you want to know how we made sure we had enough space for everything and wouldn’t have to take 5 boxes out every time we wanted to make a cuppa or get our chairs out for dinner, you’re in for a treat!
From the standard Defender 110, we added:
- long range fuel tank – giving us a total of 120L of diesel.
- 2 x 50L water tanks – connected to a hand pump and shower on the bull bar
- dual batteries
- snorkel with mushroom – the mushroom is for better dust filtering. Hmmm we are now thinking we might not add the mushroom as it also restricts air intake which Lara will need desperately once she gets to the high altitudes on our trip…
- bull bar with winch and 2 spotties (spot lights)
- air bags on the rear springs – keeps Lara more level when she is fully loaded
- air compressor – with the outlet on the rear bumper for easy access
- bash plate
- diff guards
- fuel pump access plate
- heavy duty spare wheel carrier with spare wheel (doh!) – with rear camping light
- UHF radio
- fire extinguisher
On top of the car:
- full length roof rack (2.9m)
- roof rack tent (Hannibal) – opens over the rear door
- aluminium box for on the roof rack at the front – this contains our spare tyre, our inflatable kayak and all our hiking gear, see for more details the actual box
- awning with optional mozzie tent (mosquito tent for those of you not fluent in the language of Oz)
Inside the car / storage:
- cargo barrier
- drawers – behind the passenger and driver’s seat. The fridge sits on top of these.
- 45L fridge – behind the passenger seat
- fridge table – folds down (home made)
- cupboard behind the driver’s seat – see our home made wooden cupboard description (below) for more details on the actual cupboard
- map holder – attached to the back of the central console
- 2 cup holders – attached to the central console
- storage shelf above the fridge and cupboard – accessible from the seats at the front
- gull wing doors – replacing the standard windows at the back
- one drawer running the full length of the back – divided into 3 compartments with a table on top
- two storage pods – extended for this trip to the top of the car. This means access to these pods is then only possible from the gull wing doors. They will be used for storing our clothes
- rear-window mesh – to hang things on and also for added security
- storage shelf along the top across the whole width of the car – for 3 food storage boxes
- shelves in between the 2 storage pods – for easy access to our table and chairs
- wooden box for all our kitchen equipment – stored under the shelves for the table and chairs
Below are some photos of little modifications we have done whilst on the road to make things a little easier, or simply to stop things flying around:
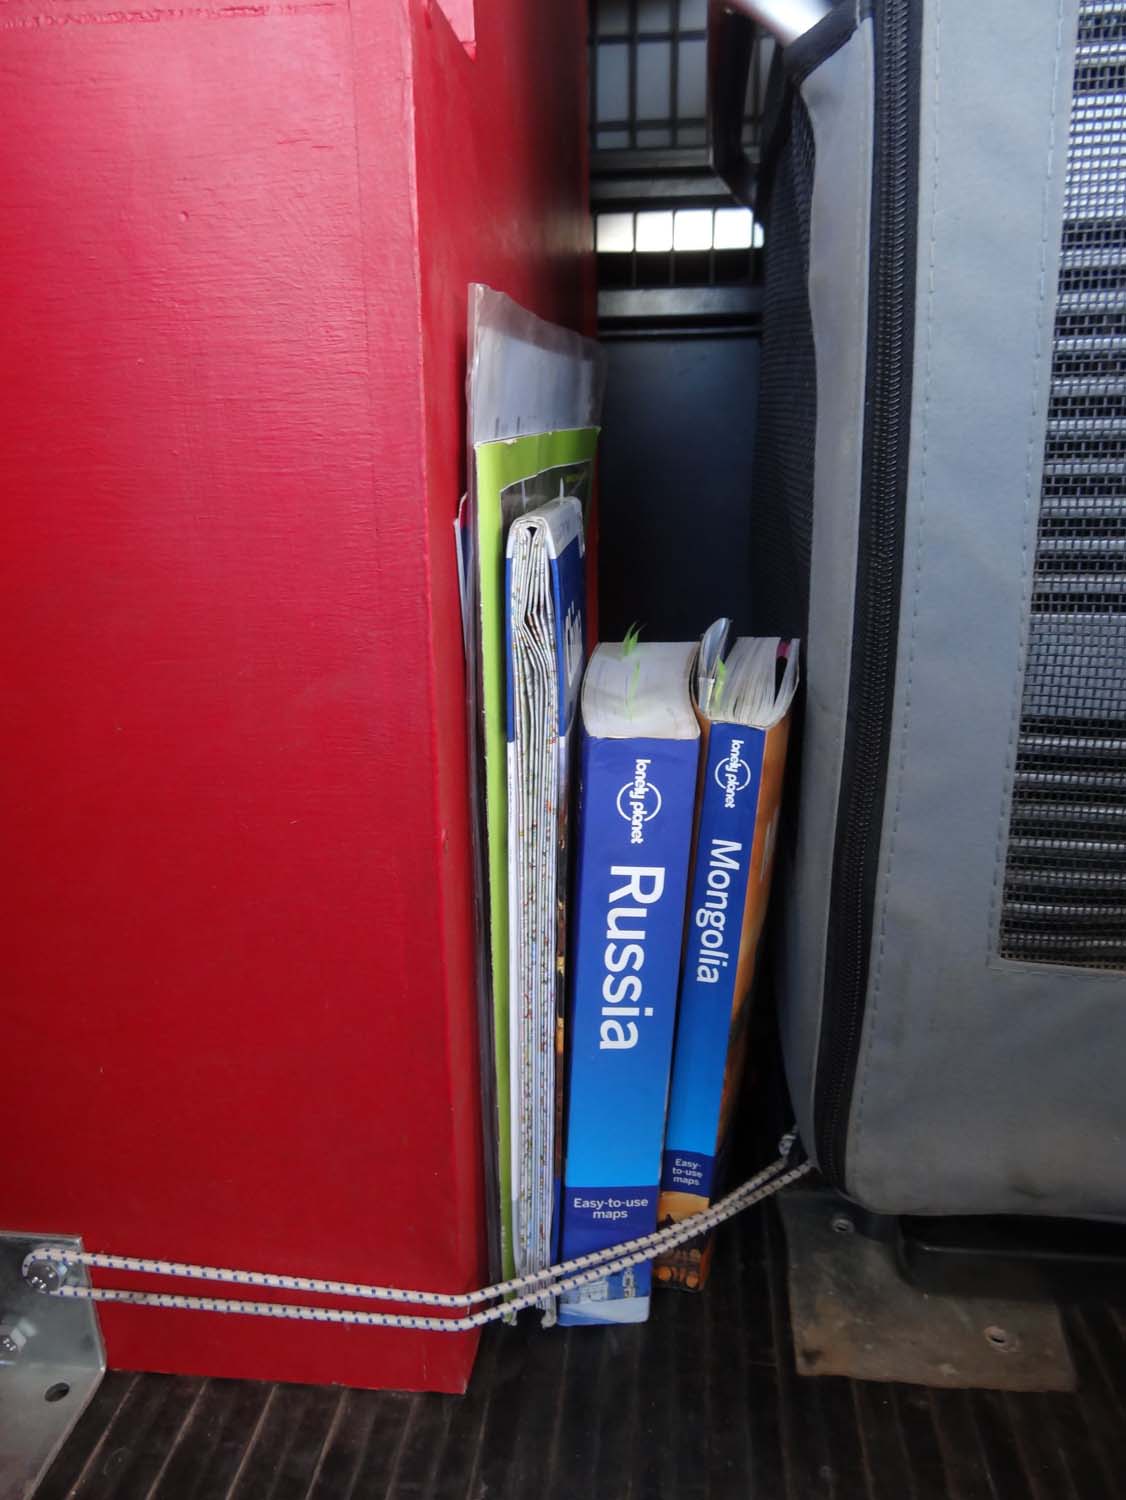
Our bookshelf on the road, handy at any time and a little elastic ensures they don’t keep falling over.

A simple seat bag with many pockets houses the suncream, mozzie spray, creme and hand wash. Very useful as we use them a lot.

The miracles a little piece of string can perform. This way we can use 2 hands to get things out of the fridge if we need to.

Both our hats are hanging up with the use of some more elastic string. They used to fly around in the car on bumpy roads.
Our home made wooden cupboard
We wanted more easily accessible storage space behind the driver’s seat and decided we could save ourselves some dollars by making it ourselves. Not sure in the long run if it did save us money, but it was definitely an interesting learning process.
It started with the idea of building a shell around existing IKEA drawers we already have. They’re the wooden boxes which have 3 drawers in them, and we have two of them. Those drawers fit A4 sized paper and as we’re expecting to have quite a bit of paperwork and maps etc to carry, we thought it would be a good idea to use those drawers for that.
To make use of the entire 65cm (ish) we had between the door and the fridge we placed them behind each other. With a wooden shell around that, we could then measure the space we had left underneath it. We came to the conclusion we had enough space to fit a toolbox with some spares for Lara (like engine oil) in the bottom area and then we still had space to make a drawer in between the top and bottom section.
We made a door on the bottom section (we used 2 (!) magnets – might be a bit too much for such a small door) and added another ‘gutter’ section to the back of the whole cupboard. This is where the inverter will live and the area in front of it is to put the actual batteries and other things we’ll be charging using the inverter. How clever is that?!
We also bought some carpet and lined the insides of the drawers, the space around the drawers and the tool box so things wouldn’t rattle too much on shitty roads…
This is what it looks like in progress and finished from the front and looking back from the passenger’s seat.

our home made cupboard – measuring

our home made cupboard – sawing

our home made cupboard – gluing carpet

our home made cupboard – adding the inverter gutter

our home made cupboard – finished and in the car
Hi Jon and Jude!
Amazing story that you guys have here. What a fantastic adventure!
My name is Rahul and I am a designer from London working for a wildlife charity called ZSL. We are in the process of creating an internal book for ZSL to describe what the charity is about and what it stands for as a brand. We needed a great Landrover image for one of the pages and came across your photograph of Lara: https://jonandjude.files.wordpress.com/2012/10/img_00023.jpg
It’s a really great image and we were wondering if you would give us permission to use the image in the book to portray adventure and working out in the wild? It is an internal book so will never be published and will be an internal facing piece of print used by staff to understand what ZSL is about and why the organisation works for wildlife. It will not be used for any commercial or profitable purposes.
Let me know what you think. We’d love to use it.
All the best,
Rahul
Hi Rahul, I have send you an email with the photo, hope it works out! Kind regards, Jude
I am loving what you have done with the 110.
Are you able to sleep in the back of it as well?
Good luck on your trp. I hope to do something similar one day.
Hi Alex, thanks for you message about Lara. We are enjoying pimping her up and she is pretty much ready to go (needs to be as she is loaded this Friday!). We don’t sleep in the back but on top, in a roof top tent. Very luxurious and spacious. We’ll definitely post some piccies once we’re on the road so you can see what it looks like.
You’ll just have to commit, only way to go! See you out there! Cheers, Jude